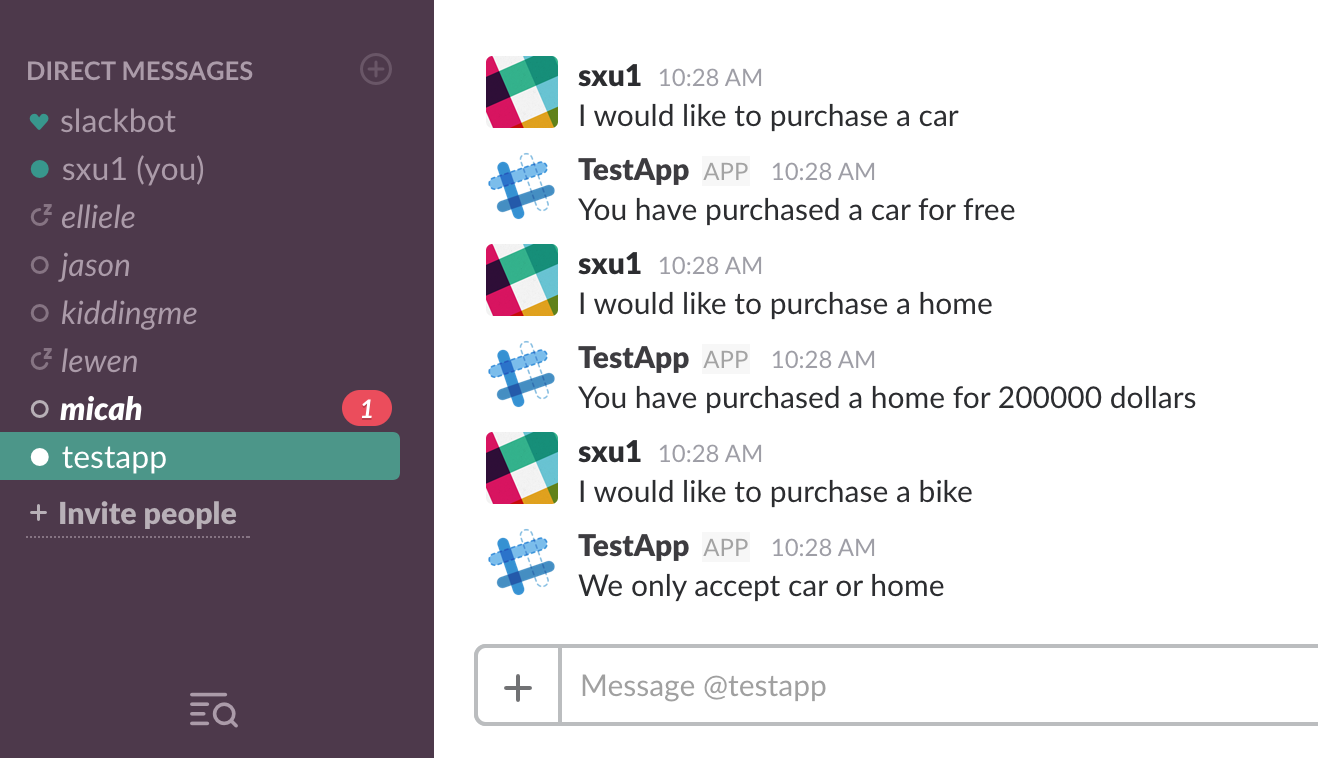
非常简单的教程,新建一个 Slack Bot 支持购买房/车的功能。主要流程: 编写 Lambda Function => 调用 Lambda function 创建 Lex bot => 创建 Slack Application 并与 Lex bot 关联 => 测试并发布。
Create Lambda Function
Lambda Function 部分的代码
|
|
有一个 purchase 的 slot,这段代码返回的是,如果买房,价格 200000 刀,如果买其他东西(slot value 限制下),都免费。
Lambda 的配置不多说了,和 Alexa 开发新技能 - Lambda的配置相同。
供测试的 input event example
Expect Result: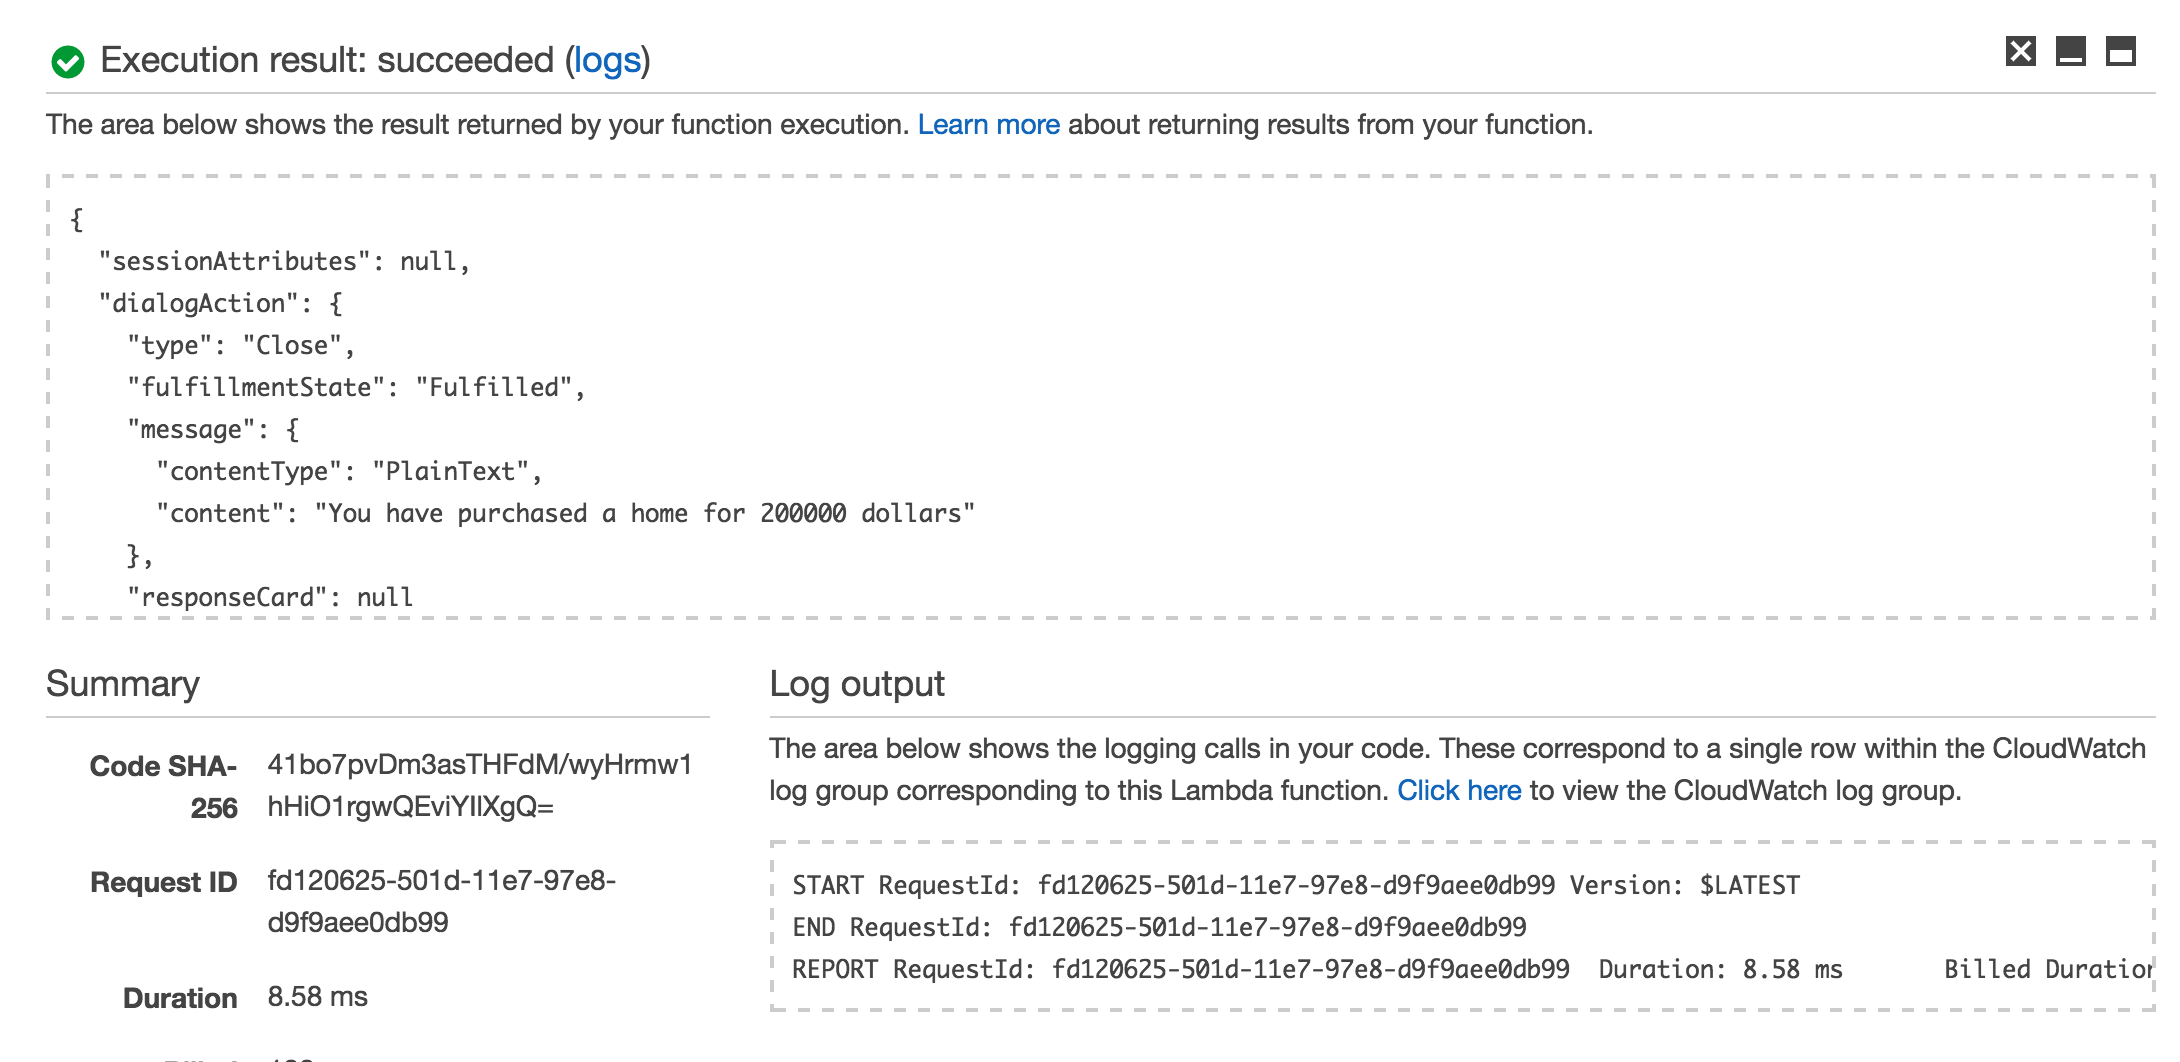
Create Amazon Lex Bot
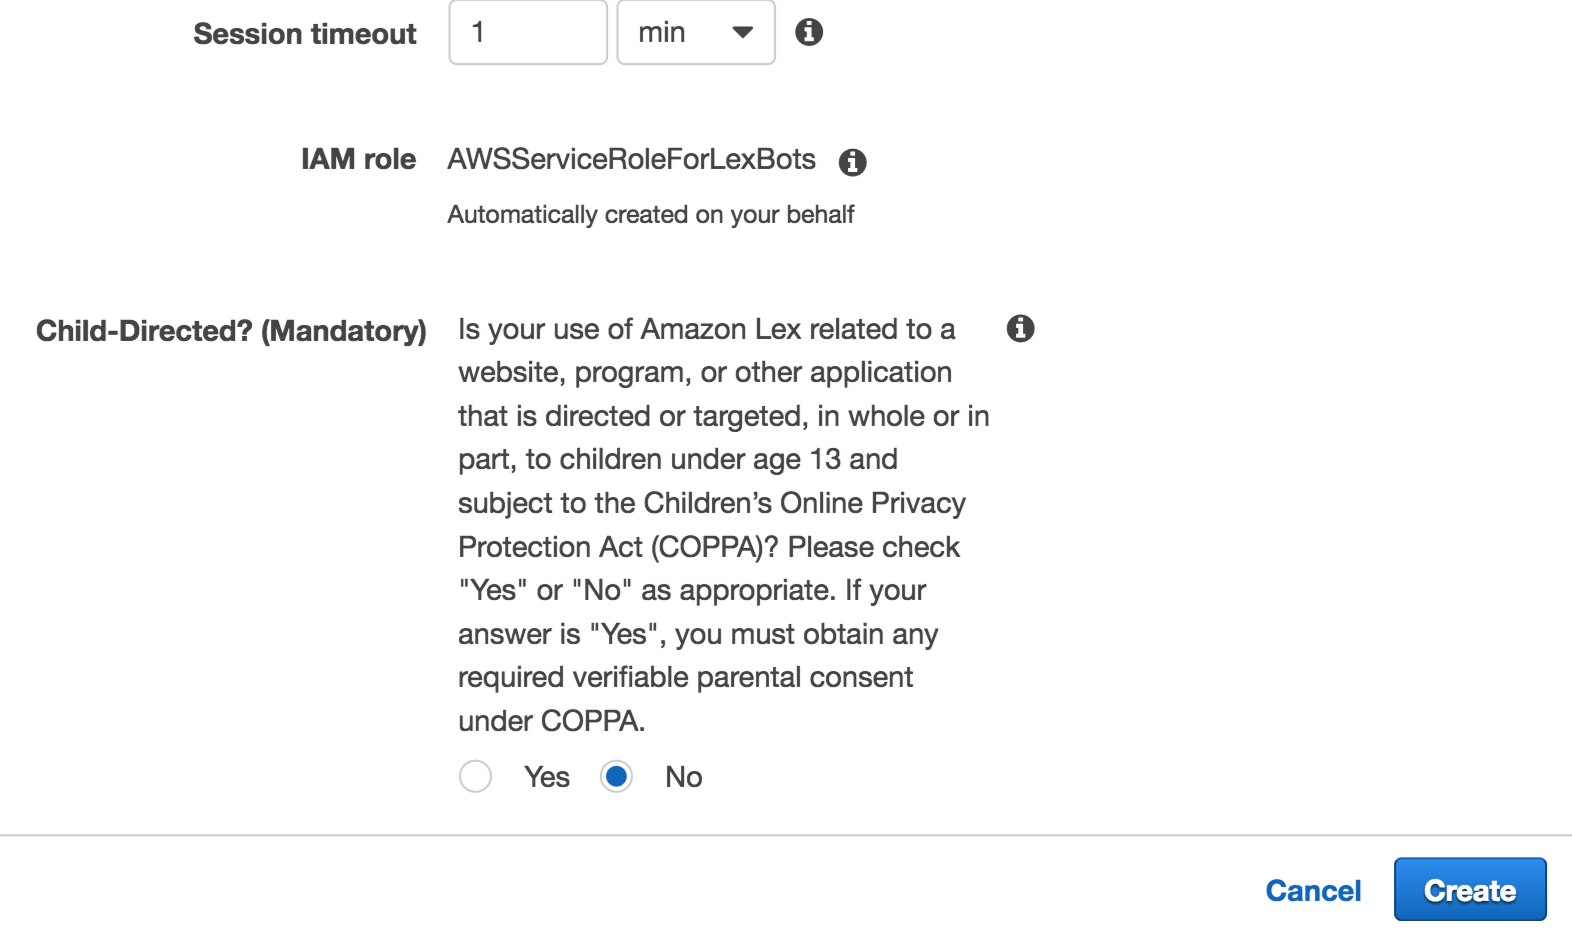
登录 AWS Lex,新建一个 bot(get started => custom bot),过程非常简单,设置基本信息包括 bot name, output voice, session timeout 等,然后创建 slot type,设置 intent,基本流程和 Alexa add new skill (尤其是 Skill Builder Beta 界面)差不多,直接上截图了。
Create Lex Bot: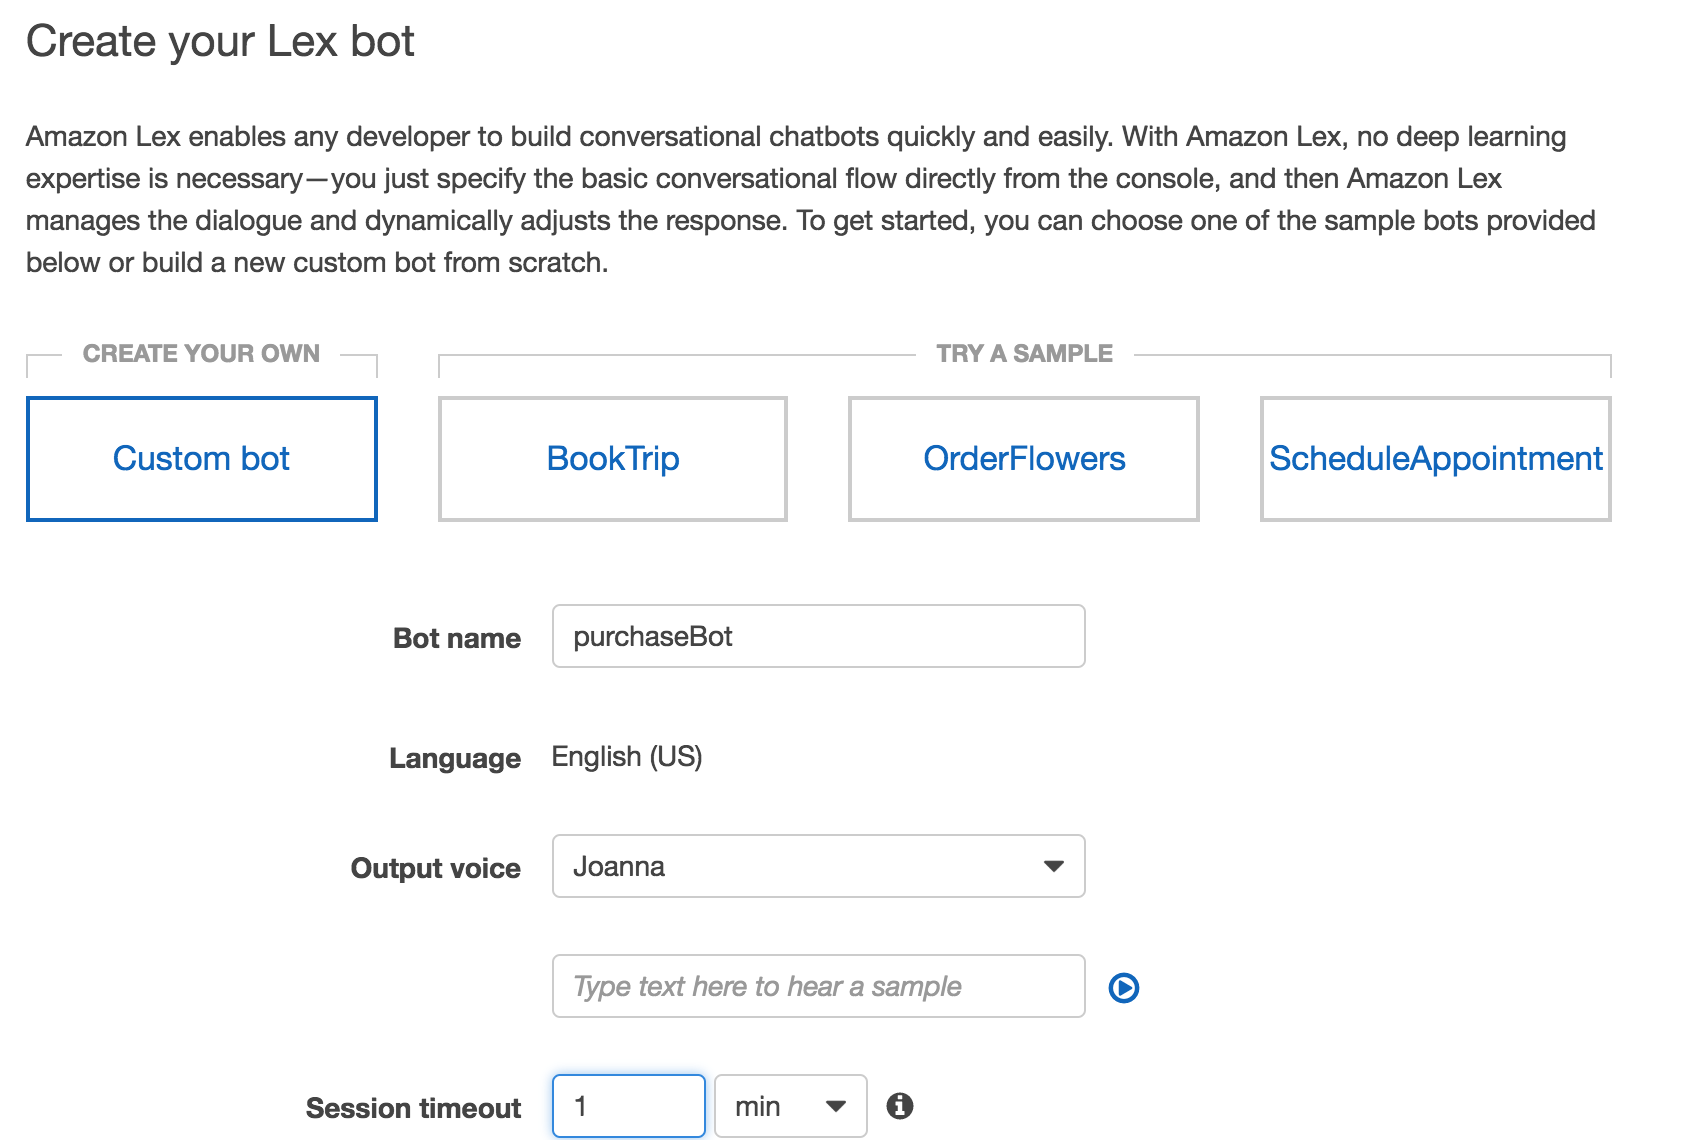
Add slot type: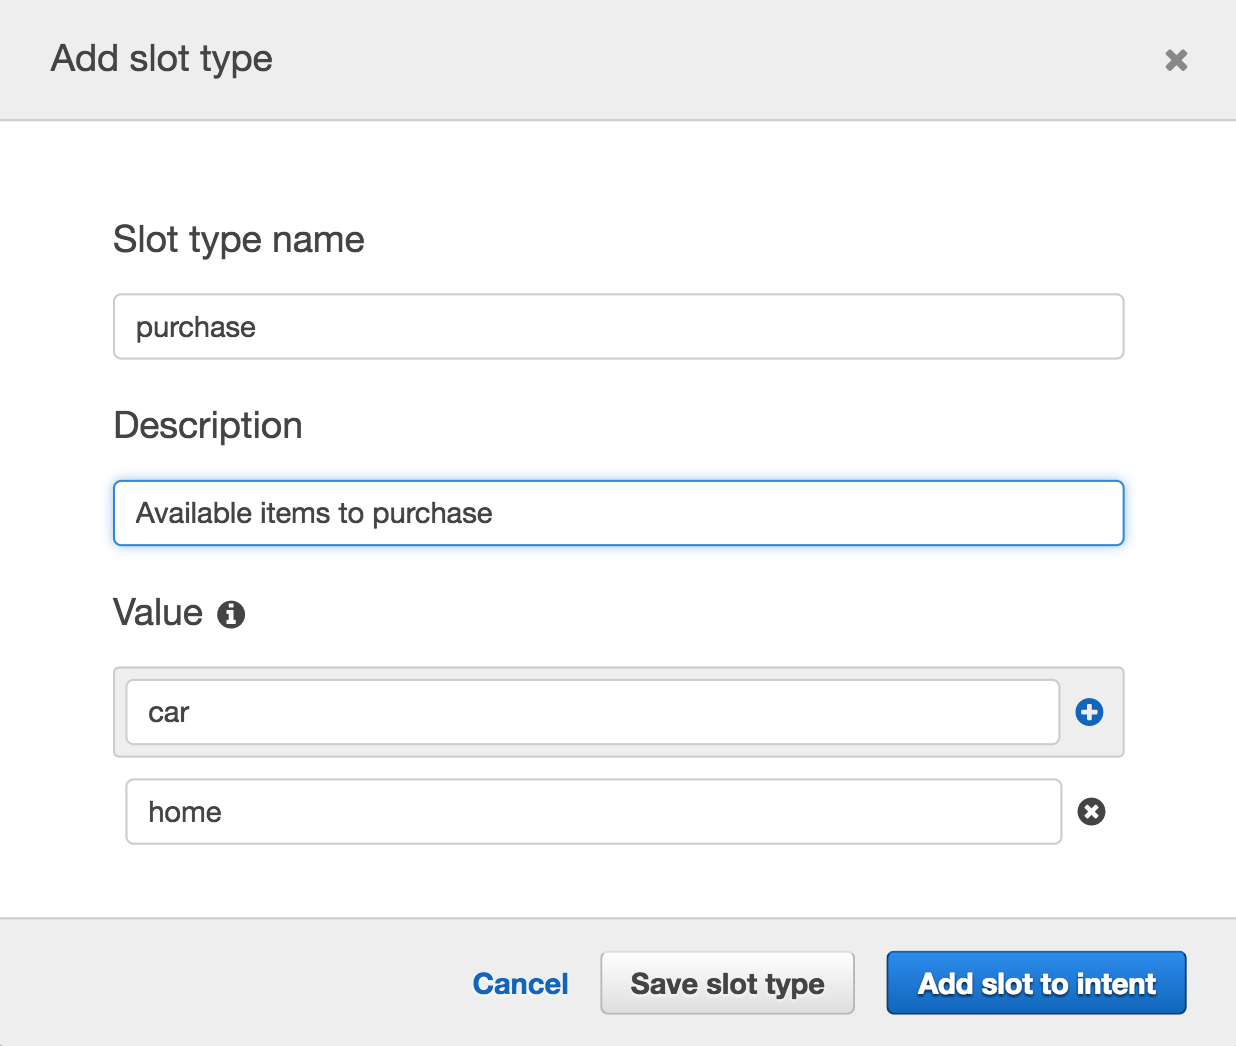
保存的 slot type 在之后所有的 bot 设置中都可以重复使用。
Add intent:
提供一些 Sample utterances
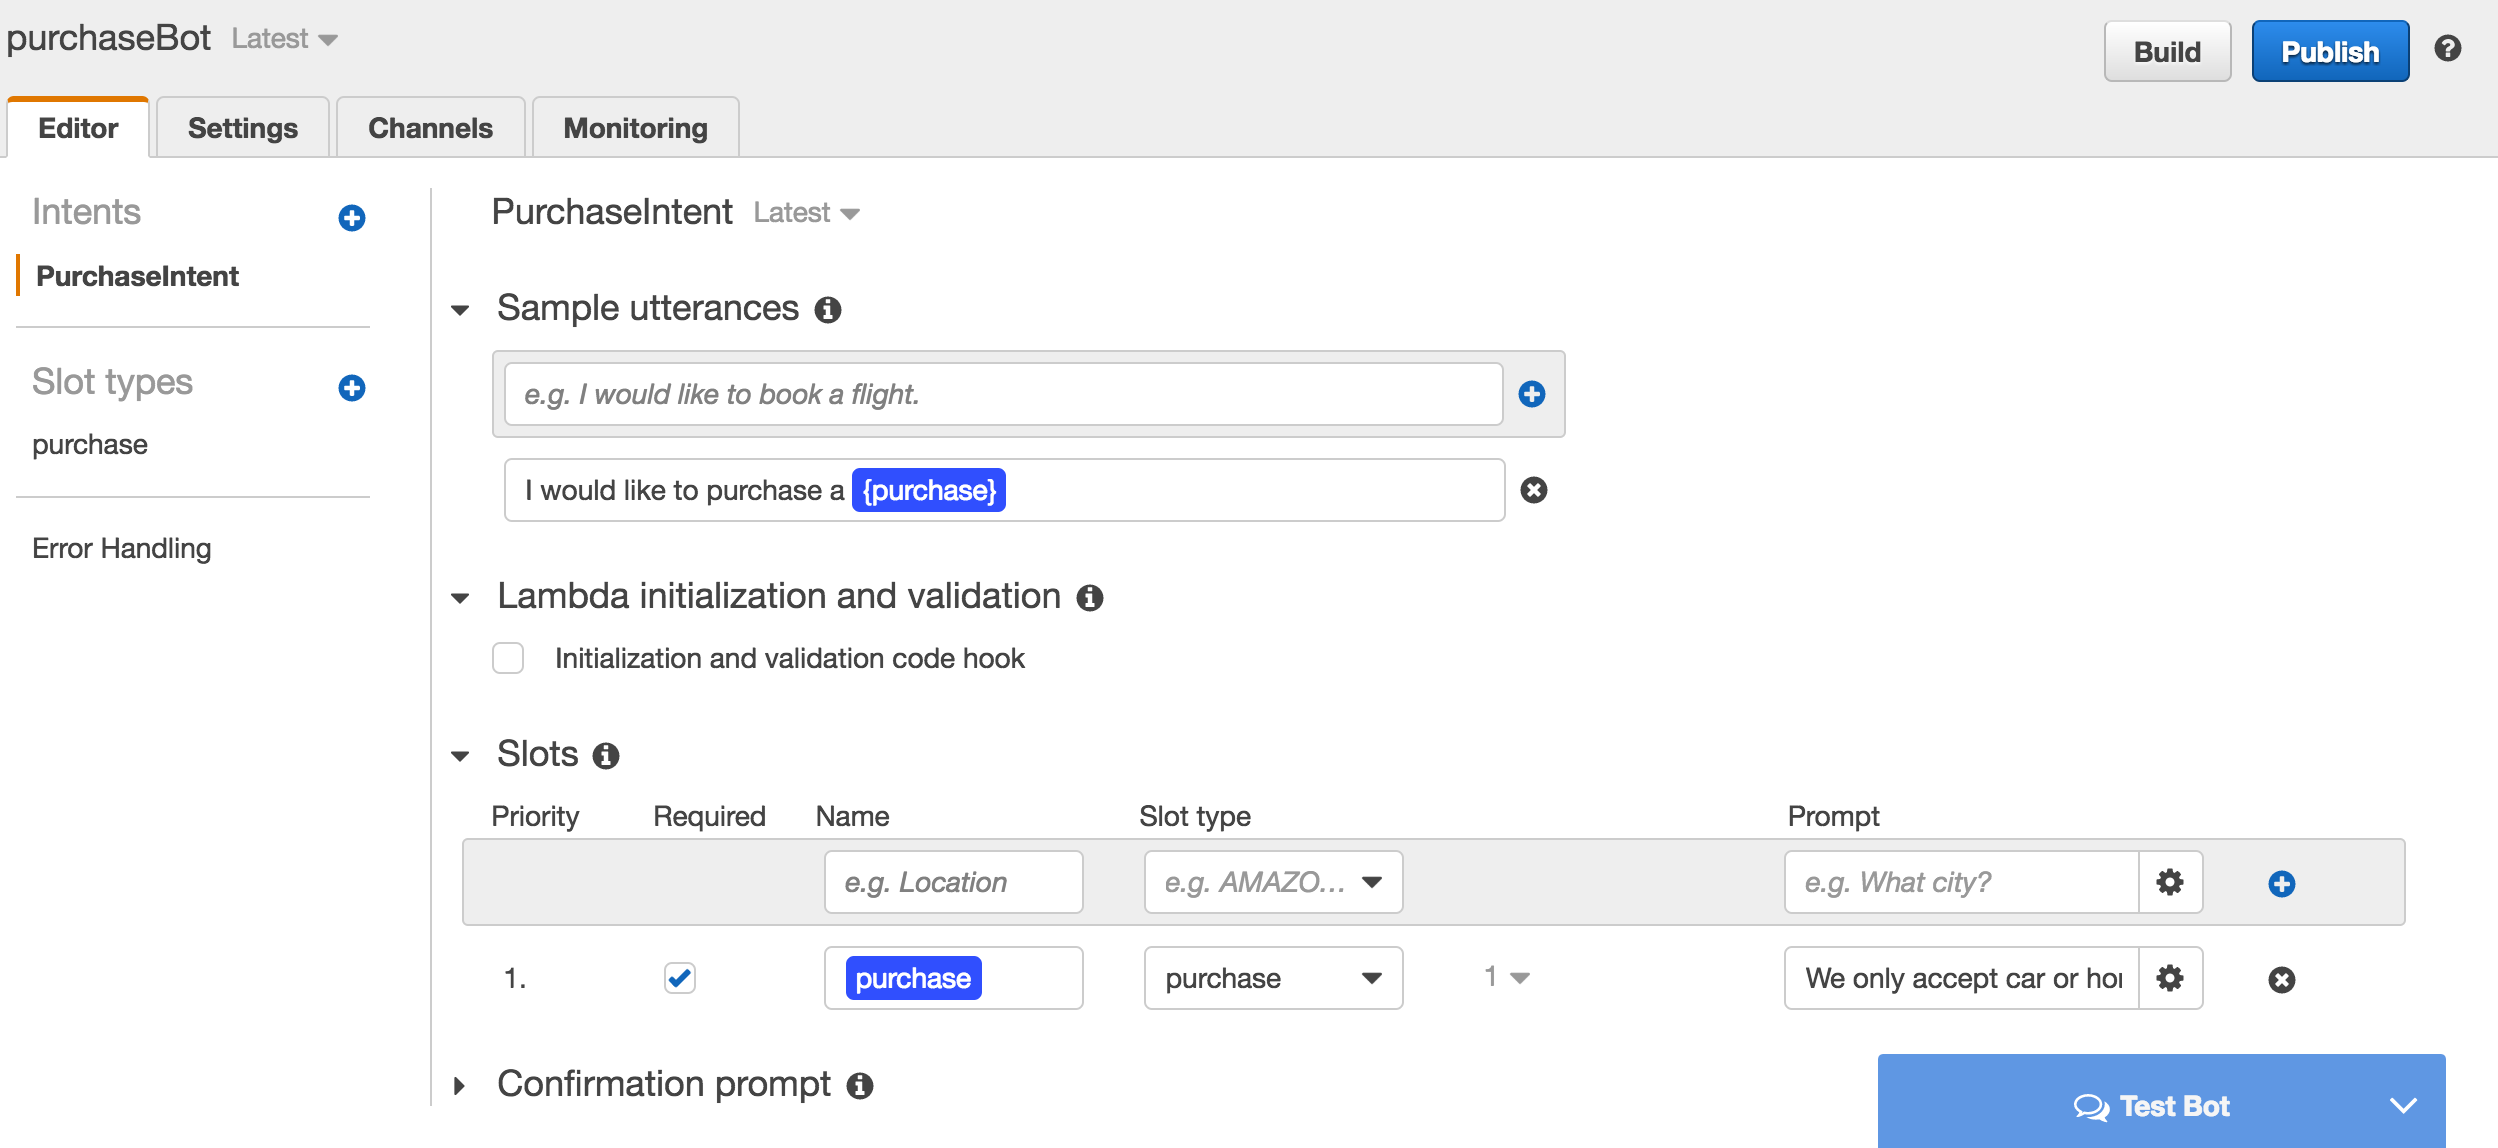
Call lambda function:
如果用户输入了除 slot value (这里是 home, car)以外的东西,就会触发 Prompt。
设置好之后选择 save intent,然后选右上角的 build,创建完成后就可以开始测试 bot,这里的测试结果有点不如人意,prompt 并没有起到作用,然而没关系,最后在 Slack 界面是 work 的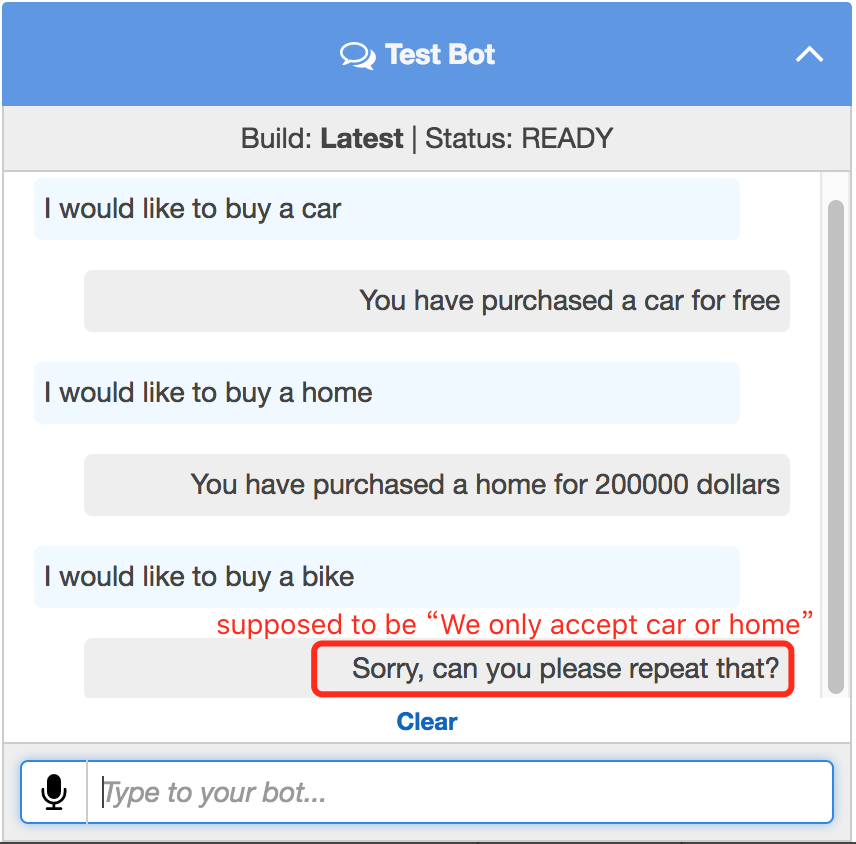
Create Slack Application
如果没有 Slack 账号,需要先注册注册
登录Slack API,选择 start building => create an app,然后进行相关设置:
- In the left menu, choose Bot Users.
- Provide a user name.
- For Always Show My Bot as Online, choose On.
Save the changes.
- Choose Interactive Messages from the left menu.
- Choose Enable Interactive Messages.
- Specify any valid URL in the Request URL box. For example, you can use https://slack.com.
Note
For now, enter any valid URL so that you get the verification token that you need in the next step. You will update this URL after you add the bot channel association in the Amazon Lex console. - Choose Enable Interactive Messages.
- In the Settings section in the left menu, choose Basic Information. Record the following application credentials:
- Client ID
- Client Secret
- Verification Token
Integrate the Slack Application with the Amazon Lex Bot
找到之前创建的 lex bot,到 Channels 标签页,在左边菜单栏选择 Slack,并提供下面的信息:
- Type a name. For example,
BotSlackIntegration. - Choose “aws/lex” from the KMS key drop-down.
- For Alias, choose the bot alias.
- Type the Client Id, Client secret, and Verification Token, which you recorded in the preceding step. These are the credentials of the Slack application.
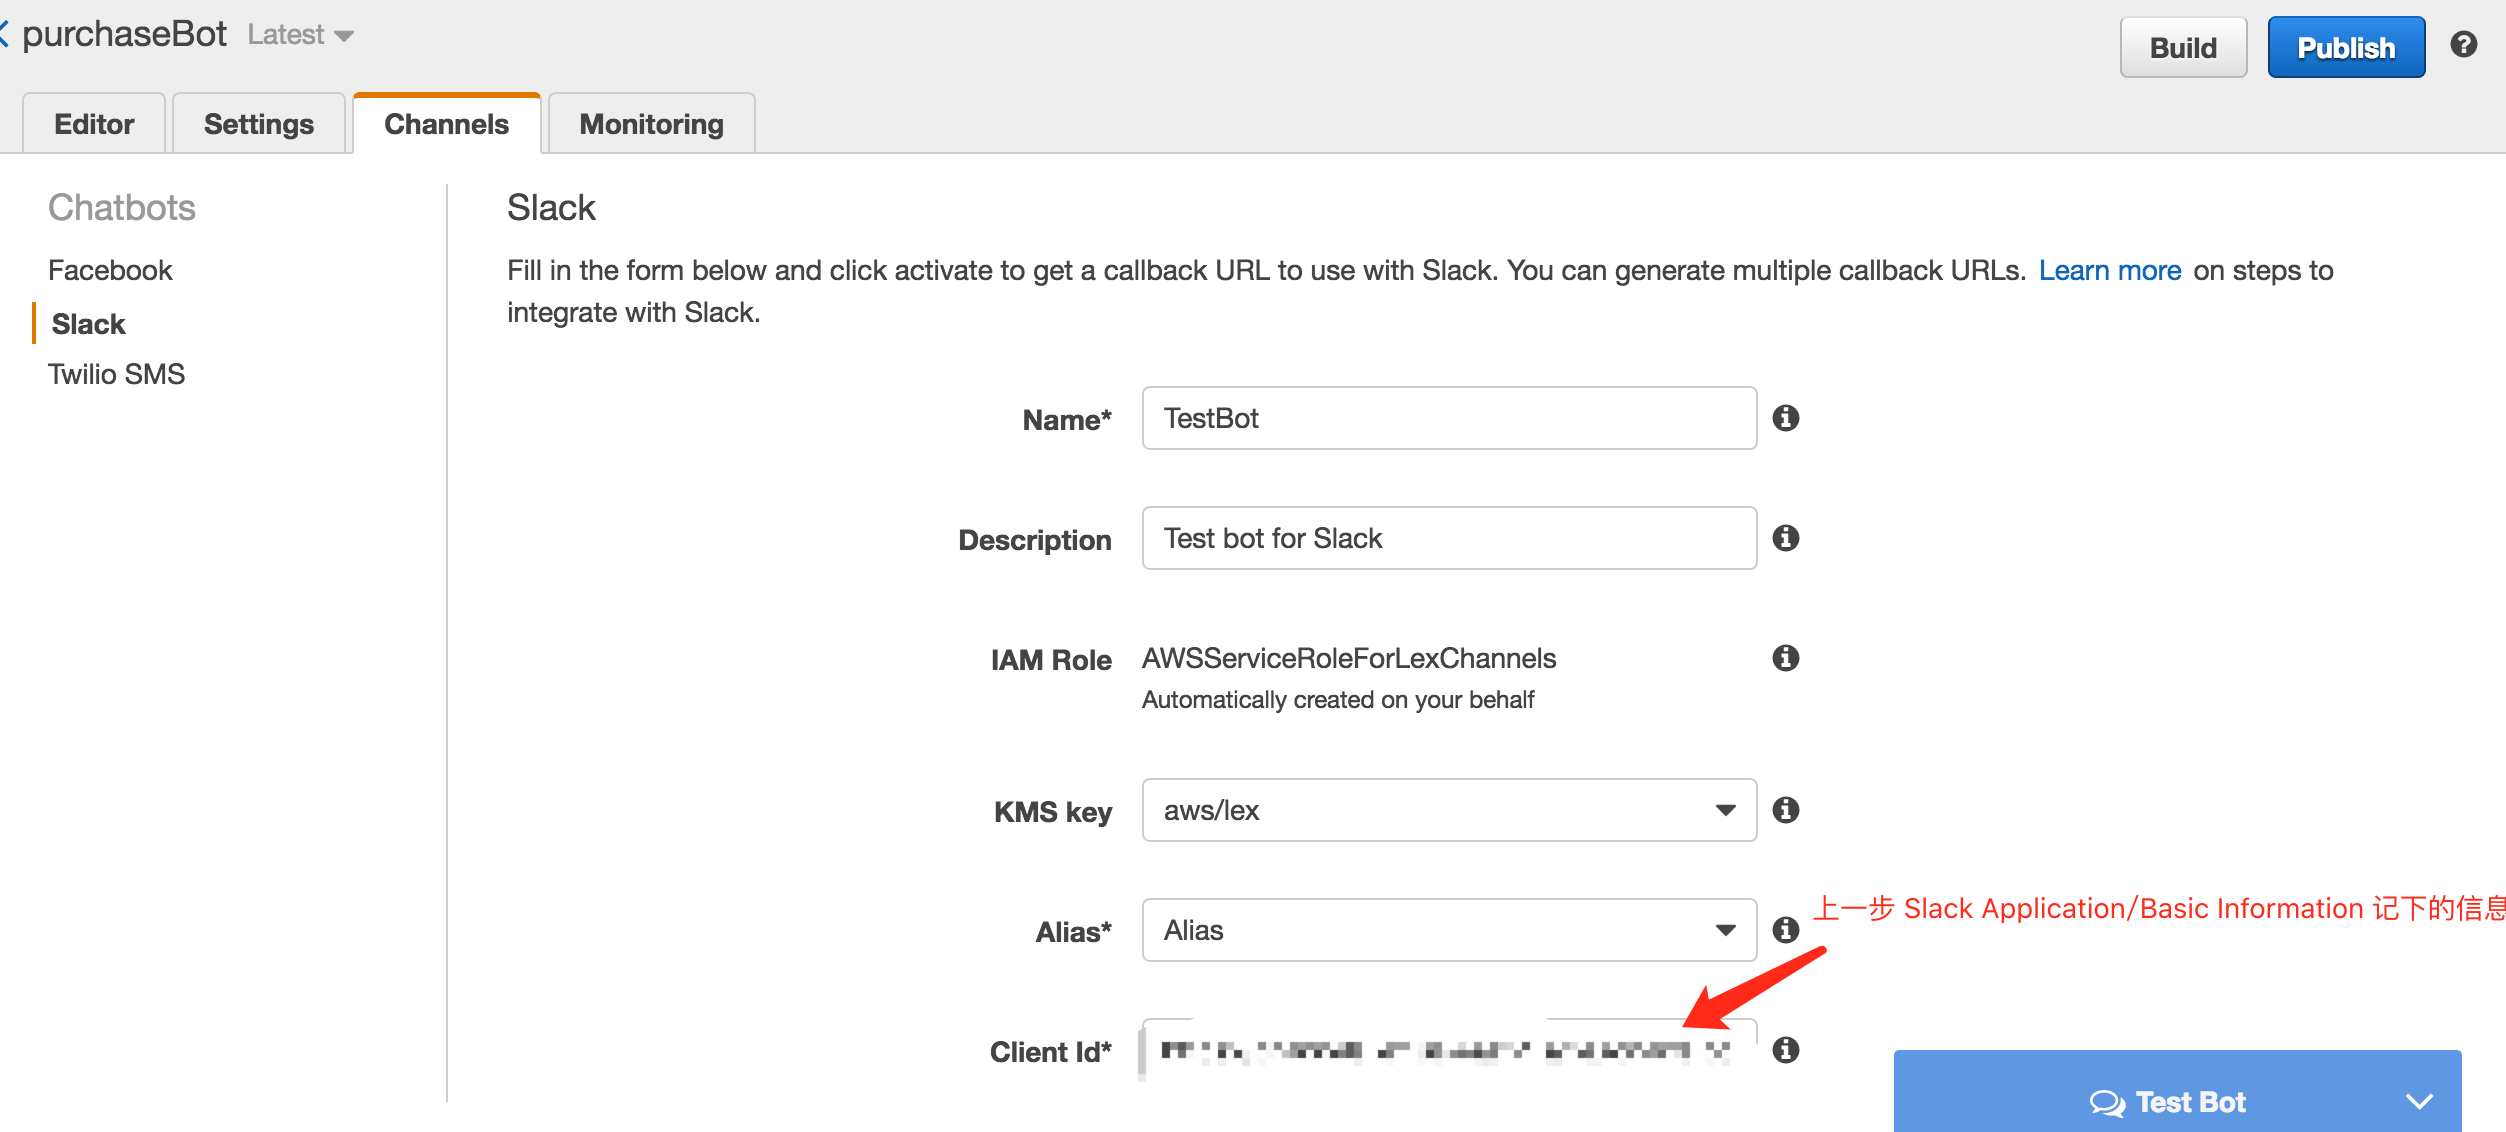
关于 Aliases 的问题,可以在 Settings 的 Aliases 部分进行设置,发现不设置 Alias 的话 Activate Bot 的时候可能会出错,所以还是设置下吧~
设置好后 Activate,记录下 Postback URL 和 OAuth URL,然后回到 Slack Application 页面,做如下设置:
- Update the OAuth & Permissions feature as follows:
- In the Redirect URLs section, add the OAuth URL that Amazon Lex provided in the preceding step. Choose Add a new Redirect URL, and then choose Save URLs.
- In the Permission Scopes section, choose two permissions in the Select Permission Scopes drop down. Filter the list with the following text:
- chat:write:bot
- team:read
Choose Save Changes.
- Update the Interactive Messages feature by updating the Request URL value to the Postback URL that Amazon Lex provided in the preceding step. Choose Add, and then choose Save URLs.
- Subscribe to the Event Subscriptions feature as follows:
- Enable events by choosing the On option.
- Set the Request URL value to the Postback URL that Amazon Lex provided in the preceding step.
- Subscribe to the
message.imbot event to enable direct messaging between the end user and the Slack bot. - Save the changes.
这里没什么 tricky 的地方,要注意的是每一步都要记得 Save
Test the Integration
- Choose Manage Distribution under Settings. Choose Add to Slack to install the application. Authorize the bot to respond to messsages.
- You are redirected to your Slack team. Choose your bot from the Direct Messages section in the left menu. If you don’t see your bot, choose the plus icon (+) next to Direct Messages to search for your bot.
- Engage in a chat with your Slack application, which is linked to the Amazon Lex bot. Your bot now responds to messages.
